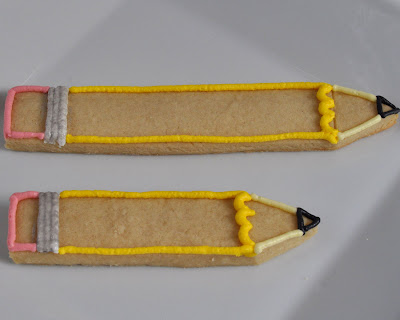
When my son saw these cookies, he asked if he could write with them. Probably not, but they are tasty!
What YouNeed:
One recipe Vanilla Sugar Cookies
Ruler
One recipe Royal Icing
Icing colors: yellow, pink, black
Tip #3
Piping Bags
Zip-top sandwich bags (or snack-size bags)
Silver Pearl Dust
Clear Vanilla Extract
Food-safe paintbrush
Plastic Wrap (for icing bag bullets)
Damp Paper Towel (to keep icing from drying out)
Make a batch of the Vanilla Sugar Cookies, and after you roll it out and refrigerate it, cut it into a square. I kept my lines straight by lining up the end of the ruler at the corners, to make a 90-degree angle.
To cut the cookies, I measured the dough to approximately 1 1/2" wide strips and cut it with a pastry cutter. A pizza cutter would also work, or a knife.
I then cut the dough in half horizontally. (Making each pencil about 4 1/2" long.)
Because I'm not good at eye-balling straight lines or angles, I measured down about 3/4" on each strip. I marked it with a knife.
Then, I marked in the top - where my point would be.
And I cut each side from mark to mark to make even points on my pencils. Do this for every pencil.
Remember that you want to put the tray of cut-outs into the freezer for 15 minutes before you put it in the oven to bake. That keeps the dough from spreading into a wonky shape.
Bake them for about 8-10 minutes in a 350-degree oven. They're done when the pencil tips start to brown.
To Decorate:
Begin by coloring your icing . I started with yellow, then the off-white for the tips, then pink, then black. This way you can use one bowl to do all of your coloring. You will need about 1/2 cup of yellow, and about 1/4 cup of white, off-white, pink and black.
You want to color the icing at the "stiffer" consistency, then take about half of it out, put it into an icing bag bullet (click the link to see the wonder of the bullet.). This is what you will make your outlines with. Then thin the other half of each color.
You won't need any white in a flooding consistency.
To thin the icing, add water about 1/2 to 1 tsp. at a time. Mix the water in until the icing is at a flooding consistency. You will know it's the right consistency when a dollop you drop in disappears in a slow count of 10.
In the photo above, you see the dollop in the middle. This is as I just dropped it in.
This photo shows that dollop when I got to 10. You can see a teeny outline on that right picture. That's all you should see at 10.
If you add too much water, you'll need to either add some more of a stiffer consistency icing, or add a little powdered sugar.
Pour this icing into a zip-top sandwich bag. That's what I use to put it on the cookies.
When you get all of your icing ready, you'll start with the lines on the pencil. Make 2 or 3 straight lines across the pencil near the "eraser" end.
While that icing dries and sets, mix up your silver "paint." Add about 1/4 tsp. of clear vanilla extract and a sprinkle of silver pearl dust in a small prep bowl or cup.
When the white icing has hardened, lightly paint the silver on the lines. If you do not wait long enough, you will smear and smoosh the lines. Also, don't try to go over it too many times. Adding a liquid to the icing will make it wet again, so again, you'll smear and smoosh. (Just like an impatient me did in the photo above.)
After I paint, I add the other outlines, one color at a time.
Then, I fill the cookies with the flooding icing, one color at a time, from eraser to tip. Remember when you're using the flooding icing to keep the cut tip of the bag in the icing as it flows out. That will help keep any lines out of the icing -- in case your icing isn't quite thin enough.
You could leave them at this, if you wish...
Or you can add the lines that give the pencil a little dimension. Start at the top of the "curve," and end at the silver line.
You could even add names or messages on the pencils in black, if you wanted. I was too tired to do this, and I loved them plain.
Wrap some up for your favorite teacher-- or student.
Click the Links Below to See:
More Back-to-School and Teacher Ideas
Cookie Decorating Ideas & Recipes
Vanilla Sugar Cookie Recipe
Royal Icing Recipe


No comments:
Post a Comment
Please note that comments containing profanity or those that are spam will not be approved on this website.