If you're growing tired of pumpkin cake pops... I understand. But I really liked these ones, so bear with me. I won't be making any more in any other form for a while, so you're safe!
Because I detail how to make the pops
here,
here,
here (with video) and
here, I'm going to spare you many of the details.
If you've never made cake pops before,
Go Here.
And if you want my Pumpkin Cake Recipe,
Go Here.
To make these upside down pumpkins, it's really easy, and you can skip buying the sprinkles or the styrofoam.
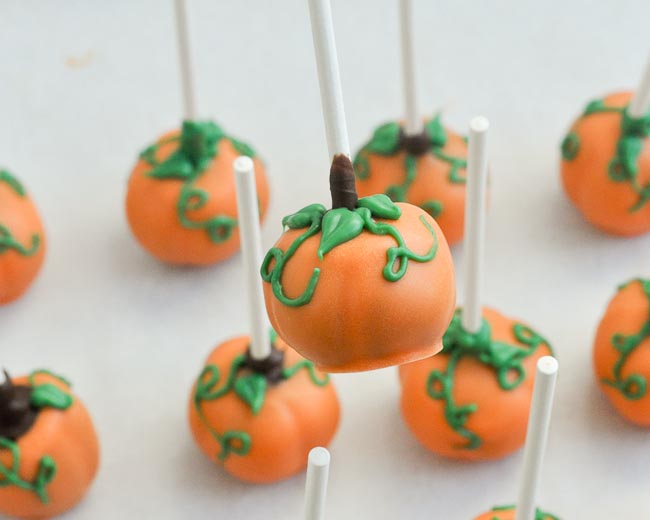
Choose whether you want green or brown stems for your pumpkins, and melt a small amount of that color candy in a small dish.
Dip the lollipop stick into the green (or chocolate) candy coating about 1 inch with thick candy.
Insert the stick into the pumpkin cake ball, which should make a large puddle of green candy coating on the top.
Turn the cake pop so that the stick is on the bottom, and
gently spin it to bring the coating down a little from the cake ball. Use a knife, spoon or spatula to then shape the melted candy into the stem.
*Note: You need to do this immediately after stabbing the cake ball with the stick, or the candy will harden in a puddle.
Allow the green candy to harden a little (3-5 minutes) before dipping in the orange. (To help keep the green from bleeding into the orange.)
Dip the pop into the orange candy, but
do not dip the green. Dip just to the edge of the green.
When you tap the pop, be careful that you don't allow the orange to drip too far over the green. You have to turn the pop a little more while tapping it so that it doesn't envelop the green.
Also, if you didn't let the green set long enough, it can drip right into the orange, so be careful and watch for that. Fish the green out if it happens, or you'll get some funky colors in there!
Set the pops on parchment or waxed paper to set.
Add leaves and vines, if you wish, using melted green candy, and decorating tips #2, #349 or #352.
If you want to see me making these, in video,
check out the segment from when I appeared on the local news doing these.
And don't forget, if you shop at
Amazon.com through my link
, you support this blog and its contents. Thank you!


Loving your pop cakes, we will have to try there for Halloween. Keep up the great work.
ReplyDeleteLove Baker
http://www.lovebaker.co.uk
Thanks for sharing this! Making some today =) I already baked up the cake and its yummy! I had a question about how the frosting. I never really thought about cream cheese frosting needing to be refrigerated, I had red velvet and carrot cake that has been left out at room temp. How long would you say you can keep these pops at room temp? I am planning on taking some to work. thanks!
ReplyDeleteMy rule for myself is that when possible, I keep it refrigerated.
DeleteAs for food safety, I'm sure there are some official rules. With more sugar in the frosting, you could probably leave it out longer. But generally, I would say no more than 2 hours or so??
A Google search finds many variations, but I found a few who agreed with my two hour rule. ;-)
I hope they go over well! I love these!! (Obviously, since I made entirely too many last fall!!)
- Beki
Wow, that is beautiful! (And looks like so much fun!)
ReplyDeleteLooks incredibly beautiful! Hope I'm going to get it done too, I will try hard to get it done with my fondant in the kitchen. :))
ReplyDeleteBest regards,
Lukas