The basket weave is one of those techniques that takes a little bit to learn, but once it 'clicks,' you can whip out a cake like this in 30 minutes flat!
What You Need:
Cake & Icing (I prefer my
Decorator's Buttercream Icing for this. But I used
Cream Cheese Icing here-- not recommended for beginners because the consistency is harder to get just right.)
Wilton Tip #47 (use two tips if you want alternating colors)
Wilton Tip #21 (for the border)
Prepare the Cake:
Start with a cake that is covered with a thin coat of icing. This will do two things:
1- It will help the basket weave stick to the cake.
2- It will help blend in any mistakes you make by having the cake be the same color as the icing.
(Click the link for my
Tutorial on How to Ice a Cake.)
Step 1:
Using Wilton Tip #47 (or other basket weave tip), make a
straight, vertical line from the top of the cake to the bottom. You want the back side of the tip to be
lightly touching the side of the cake.
Step 2:
Add 'spacing dots' on either side of the vertical line as you see in the photo above. These dots will help you know how far to make your horizontal lines. Making them at the top and the bottom of the cake helps you keep the lines
relatively even in length.
Step 3:
Begin making the horizontal lines. This is where it gets a little tricky.
You want to do
every other line. To do this, I like to think in evens and odds. The first set, you will do lines 1, 3, 5, 7, etc. for the evens, you will do spacer dots like you did before... only these will go vertically. They take the place of where line 2, 4, 6, etc. go.
Start the horizontal lines from the bottom. I once heard the memory trick of "The firefighter climbs up the ladder, slides down the pole." In other words, you start your horizontal lines at the bottom, and your vertical lines at the top.
Step 4:
When you've made your way to the top of the cake with your horizontal lines, turn the tip, and make another vertical line-- top to bottom-- that covers your spacer dots.
Step 5:
Now that you've made your first set of rows... on the odds... this set will be on the evens.
So, this time, you start line 1 with a spacer dot. And you will need a spacer dot both horizontally and vertically. One to mark how far over to go. One to mark your space in line 1.
You have bars on the evens this time: lines 2, 4, 6, 8, 10. Your spacer dots are on the odds: lines 1, 3, 5, 7, 9.
Sometimes it's hard to remember those spacing dots, especially the one that shows you how far to go over. But if you skip them, it's really hard to keep things even. And if you skip the spacing dots between each horizontal line, you'll get around to the other side of the cake, and you'll have a whole different number of lines because it's hard to keep the lines straight. (You can see that it's hard to keep them straight and even, even with the dots!!)
Step 6:
Continue
alternating the horizontal rows, evens-odds-evens-odds... Remembering that vertical line each time. (That's what always seems easy to forget at first.)
Here's the Video:
Make the Border:
This is a rope-style border. I
love this border. I learned it in my second Wilton course way back in the day, and it was the only border I used for at least 5 years after that.
Using Tip #21 (or Tip #18), start with a sideways "S." Be
sure your border is on the cake...
not on the basket weave. If you let it rest on the basket weave, it can pull the entire side off of the cake. (That is so sad.)
Add the next part by tucking the tip in the upward curve of the S... pull towards yourself, then "up-over-down." So, what I say to myself while I do it is "Down, Up, Over, Down." Make sure you make a
complete S each time. It's easy to forget the 'tail,' which will make your rope really flat.
Here's the Video:
Rope Border from Beki Cook on Vimeo.
It takes a few tries, but once you get this border, I hope you love it as much as I do.
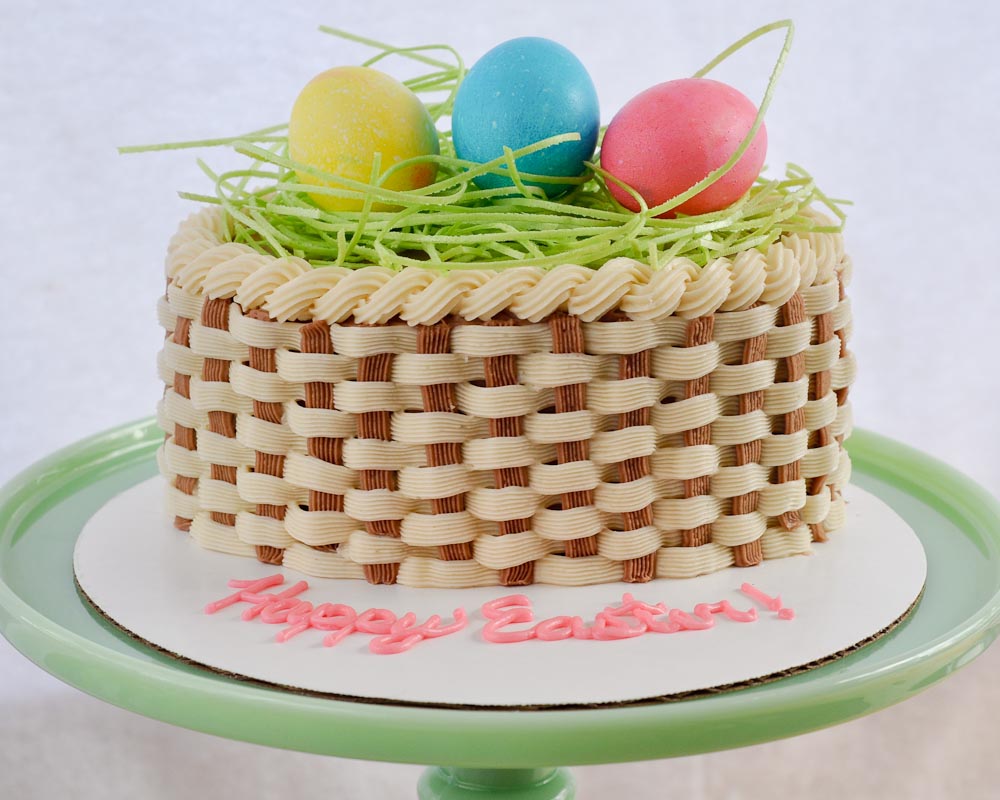
To finish decorating this cake, I used some 'edible Easter grass' that I bought at Target, I wrote Happy Easter on the cake board, and I stuck a few of our dyed Easter eggs on top.
*Note: Only one of the four people in this house found the 'edible' grass to actually be edible. But it's easy to pick off as well.
Click the Links Below To See:
Easter Cake Pops/Truffles
Easter Egg Cookie Bouquet
Petal Decorating Technique
And don't forget, if you shop at
Amazon.com through my link
, you support this blog and its contents. Thank you!


Why not use colored shredded cocount instead?
ReplyDeleteThat looks amazing!
ReplyDeleteSo cute
ReplyDelete